5 July 2023 · 3 min read
JWT Authentication in Flutter for WordPress
A Flutter app that logs in and registers users through the WordPress API, with JWT token creation and validation and secure token storage.
Mobile apps for WordPress sites need a safe, personalized experience for their users. This post covers a Flutter app that signs users in through the WordPress API, creates a JWT token for them and validates it afterwards. The GitHub repository of the app is linked in the setup section.
Why an app needs authentication
Authentication confirms who a user is. You need it to limit access to sensitive data, to personalize the experience and to block abuse such as attacks with fake accounts.
JWT (JSON Web Token) is an open standard (RFC 7519) for verifying and carrying identity. A JWT has three parts, a header, a payload and a signature:
- The header gives the token type and the signing algorithm.
- The payload holds the claims or data the token carries. This is usually authentication details and other user information.
- The signature is made by signing the header, the payload and a secret key together. It lets the receiver of the token (usually a server) check that the token was not changed and comes from a trusted source.
Two ways JWTs are used:
- Authentication. When a user logs in with a username and password, the server creates a JWT and sends it back. The user then sends the token in the
Authorizationheader with every later request. The server validates it on each request and that tells it who the user is. - Information sharing. JWTs are often used to pass information between two systems safely. The information sits in the payload, and the signature guarantees it was not changed.
With JWT, the state is kept on the client instead of the server. That helps scalability, since any server can handle any request. JWTs can also carry information safely between different systems.
The app
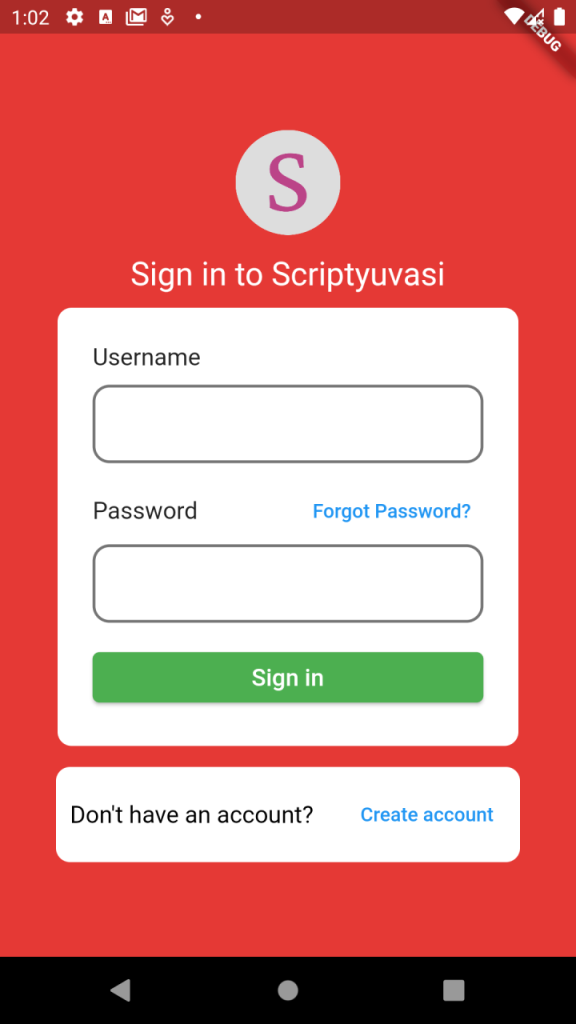
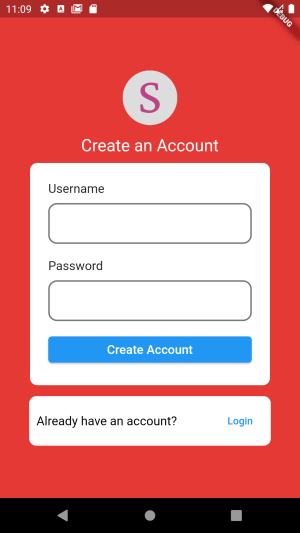
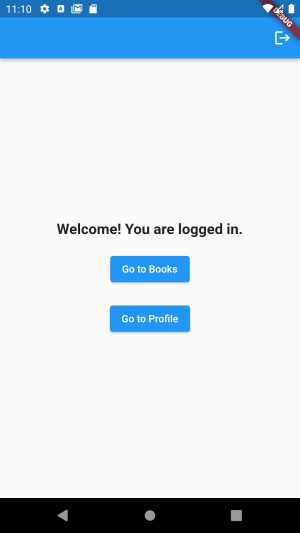
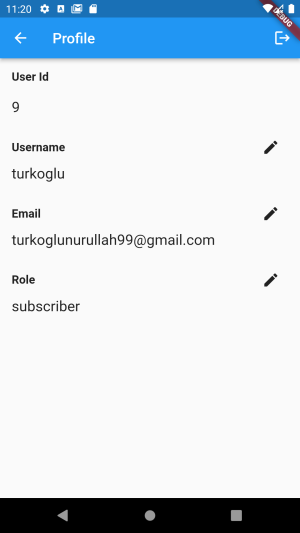
Screens of the app: login, register, home and profile.
Features
- JWT authentication. Users sign in with JWT, and each login creates a token that is valid for a set period.
- WordPress login. Users sign in to their WordPress accounts through the WordPress API.
- Token creation and validation. The app creates and validates a unique token for each login.
- Token-based access. Certain pages need a valid token, so only users with the right token can open them.
- WordPress API integration, for both registration and login.
- Data storage. User information is stored with
shared_preferences, which keeps the app fast. - Secure token storage. Tokens are stored with
secure_storage, which protects them from unauthorized use.
Setup
Clone the project:
git clone https://github.com/nurullahturkoglu/flutter-jwt-auth-for-wordpress.git
Get the dependencies:
flutter pub get
Run the app:
flutter run
Usage
Here are the important files and what changes in them.
Auth middleware
auth_middleware.dart turns on token validation for pages. If the user has no token, the token has expired or the token is invalid, they are sent to the login page automatically.
Future<void> validateToken() async {
    bool isValid = await WordPressAuthMethods().validateUserToken();

    if (!isValid) {
      navigateToLoginPage();
      return;
    }

    setState(() {
      isAuthenticated = isValid;
    });
}
WordPress auth methods
wordpress_auth_methods.dart handles WordPress login, registration and validation. User information is stored with shared_preferences and the token with secure_storage. If there is no token or it has expired, the user is sent to the login page.
Login
I made some changes to jwt-authentication-for-wp-rest-api/public/class-jwt-auth-public.php in the Tmeister/wp-api-jwt-auth repository. This is the code I added to the generate_token part:
'user_id'         => $user->data->ID,
'user_role'       => $user->roles[0],
With that, a successful login returns a response like this:
{
    "token": "eyJ0eXAiOiJKV1QiLCJhbGciOiJIUzI1NiJ9.***",
    "user_id": "13",
    "user_email": "nurullahturkoglu@gmail.com",
    "user_nicename": "Nurullah Turkoglu",
    "user_display_name": "turkoglu1",
    "user_role": "subscriber"
}
To get the user ID more efficiently, I added this to the validate_token function:
'data' => [
    'status' => 200,
    'user_id' => $token->data->user->id,
],
If the token is valid, the response looks like this:
{
    "code": "jwt_auth_valid_token",
    "data": {
        "status": 200,
        "user_id": "13"
    }
}
Registration
I also added an extra API so users can register on your WordPress site. I put it next to the login and token validation functions so it is easy for me to find, but you can put this code in your functions.php instead. First, create the route for registration:
register_rest_route($this->namespace, '/register', array(
    'methods'             => 'POST',
    'callback'            => array($this, 'create_user'),
    'permission_callback' => '__return_true',
));
Then write the create_user() function. If everything is fine, it passes the username and password it received to WordPress's own wp_create_user($username, $password) function.
function create_user($request) {
    $params = $request->get_params();

    // Get the username and password
    $username = sanitize_text_field($params['username']);
    $password = sanitize_text_field($params['password']);

    // Check if a user with the same username already exists
    $existing_user = get_user_by('login', $username);
    if ($existing_user) {
        // A user with the same username already exists
        $response = array(
            'status'  => 'error',
            'message' => 'The username is already taken.',
        );
    } else {
        // Create a new user
        $user_id = wp_create_user($username, $password);

        if (!is_wp_error($user_id)) {
            // Successful registration
            $response = array(
                'status'  => 'success',
                'message' => 'User created successfully.',
                'user_id' => $user_id,
            );
        } else {
            // Error occurred
            $error = $user_id->get_error_message();
            $response = array(
                'status'  => 'error',
                'message' => "Failed to create user. $error",
            );
        }
    }

    // Return the response
    return $response;
}
Now your WordPress site has a registration API. Send a POST request with the following JSON to https://yourdomain.com/wp-json/jwt-auth/v1/register to create a new user:
{
    "username": "test123",
    "password": "123"
}
Main code
The main file uses routes for navigation. Before the pages we want to protect, we wrap them in the AuthMiddleware() widget. It checks the token first and only then lets the user reach the requested widget.
return MaterialApp(
  title: 'JWT Auth Tutorial',
  routes: {
    '/login': (context) => const LoginPage(),
    '/register': (context) => const RegisterPage(),
    '/home': (context) => const AuthMiddleware(child: HomePage()),
    '/book': (context) => const AuthMiddleware(child: BookPage()),
    '/profile': (context) => const AuthMiddleware(child: ProfilePage()),
  },
  home: const LoginPage(),
);